So you’ve got a nice little homelab humming — maybe it’s just a lonely Proxmox box running 23 containers, or maybe you’ve got a full 42U rack in the basement with more Ubiquiti than sense. Either way, you’ve got self-hosted stuff you want to access from the outside world — securely, and without dealing with port forwarding, dynamic DNS, or the spiritual agony that is your ISP’s CGNAT.
Welcome to the future: Cloudflare Tunnels, now managed from the Cloudflare dashboard.
⚡ Wait, What’s a Cloudflare Tunnel?
Cloudflare Tunnel (formerly Argo Tunnel, RIP) is a tool that lets you securely expose services from your internal network without opening any ports.
- No NAT.
- No port forwarding.
- No firewall rule sacrifices.
- Just a secure outbound tunnel to Cloudflare’s edge, and your service is live on the internet (optionally protected by Cloudflare Access, IP lists, etc.).
🧠 Why Use the Dashboard-Managed Version?
The legacy version of cloudflared required managing configs and credentials locally. It worked fine, but now Cloudflare lets you do it all via the Zero Trust Dashboard.
Advantages:
- No editing YAML on your server.
- Easy multi-machine setup.
- Centralized tunnel and DNS management.
- GUI. Clicky clicky. 👆
🛠️ What We’re Building
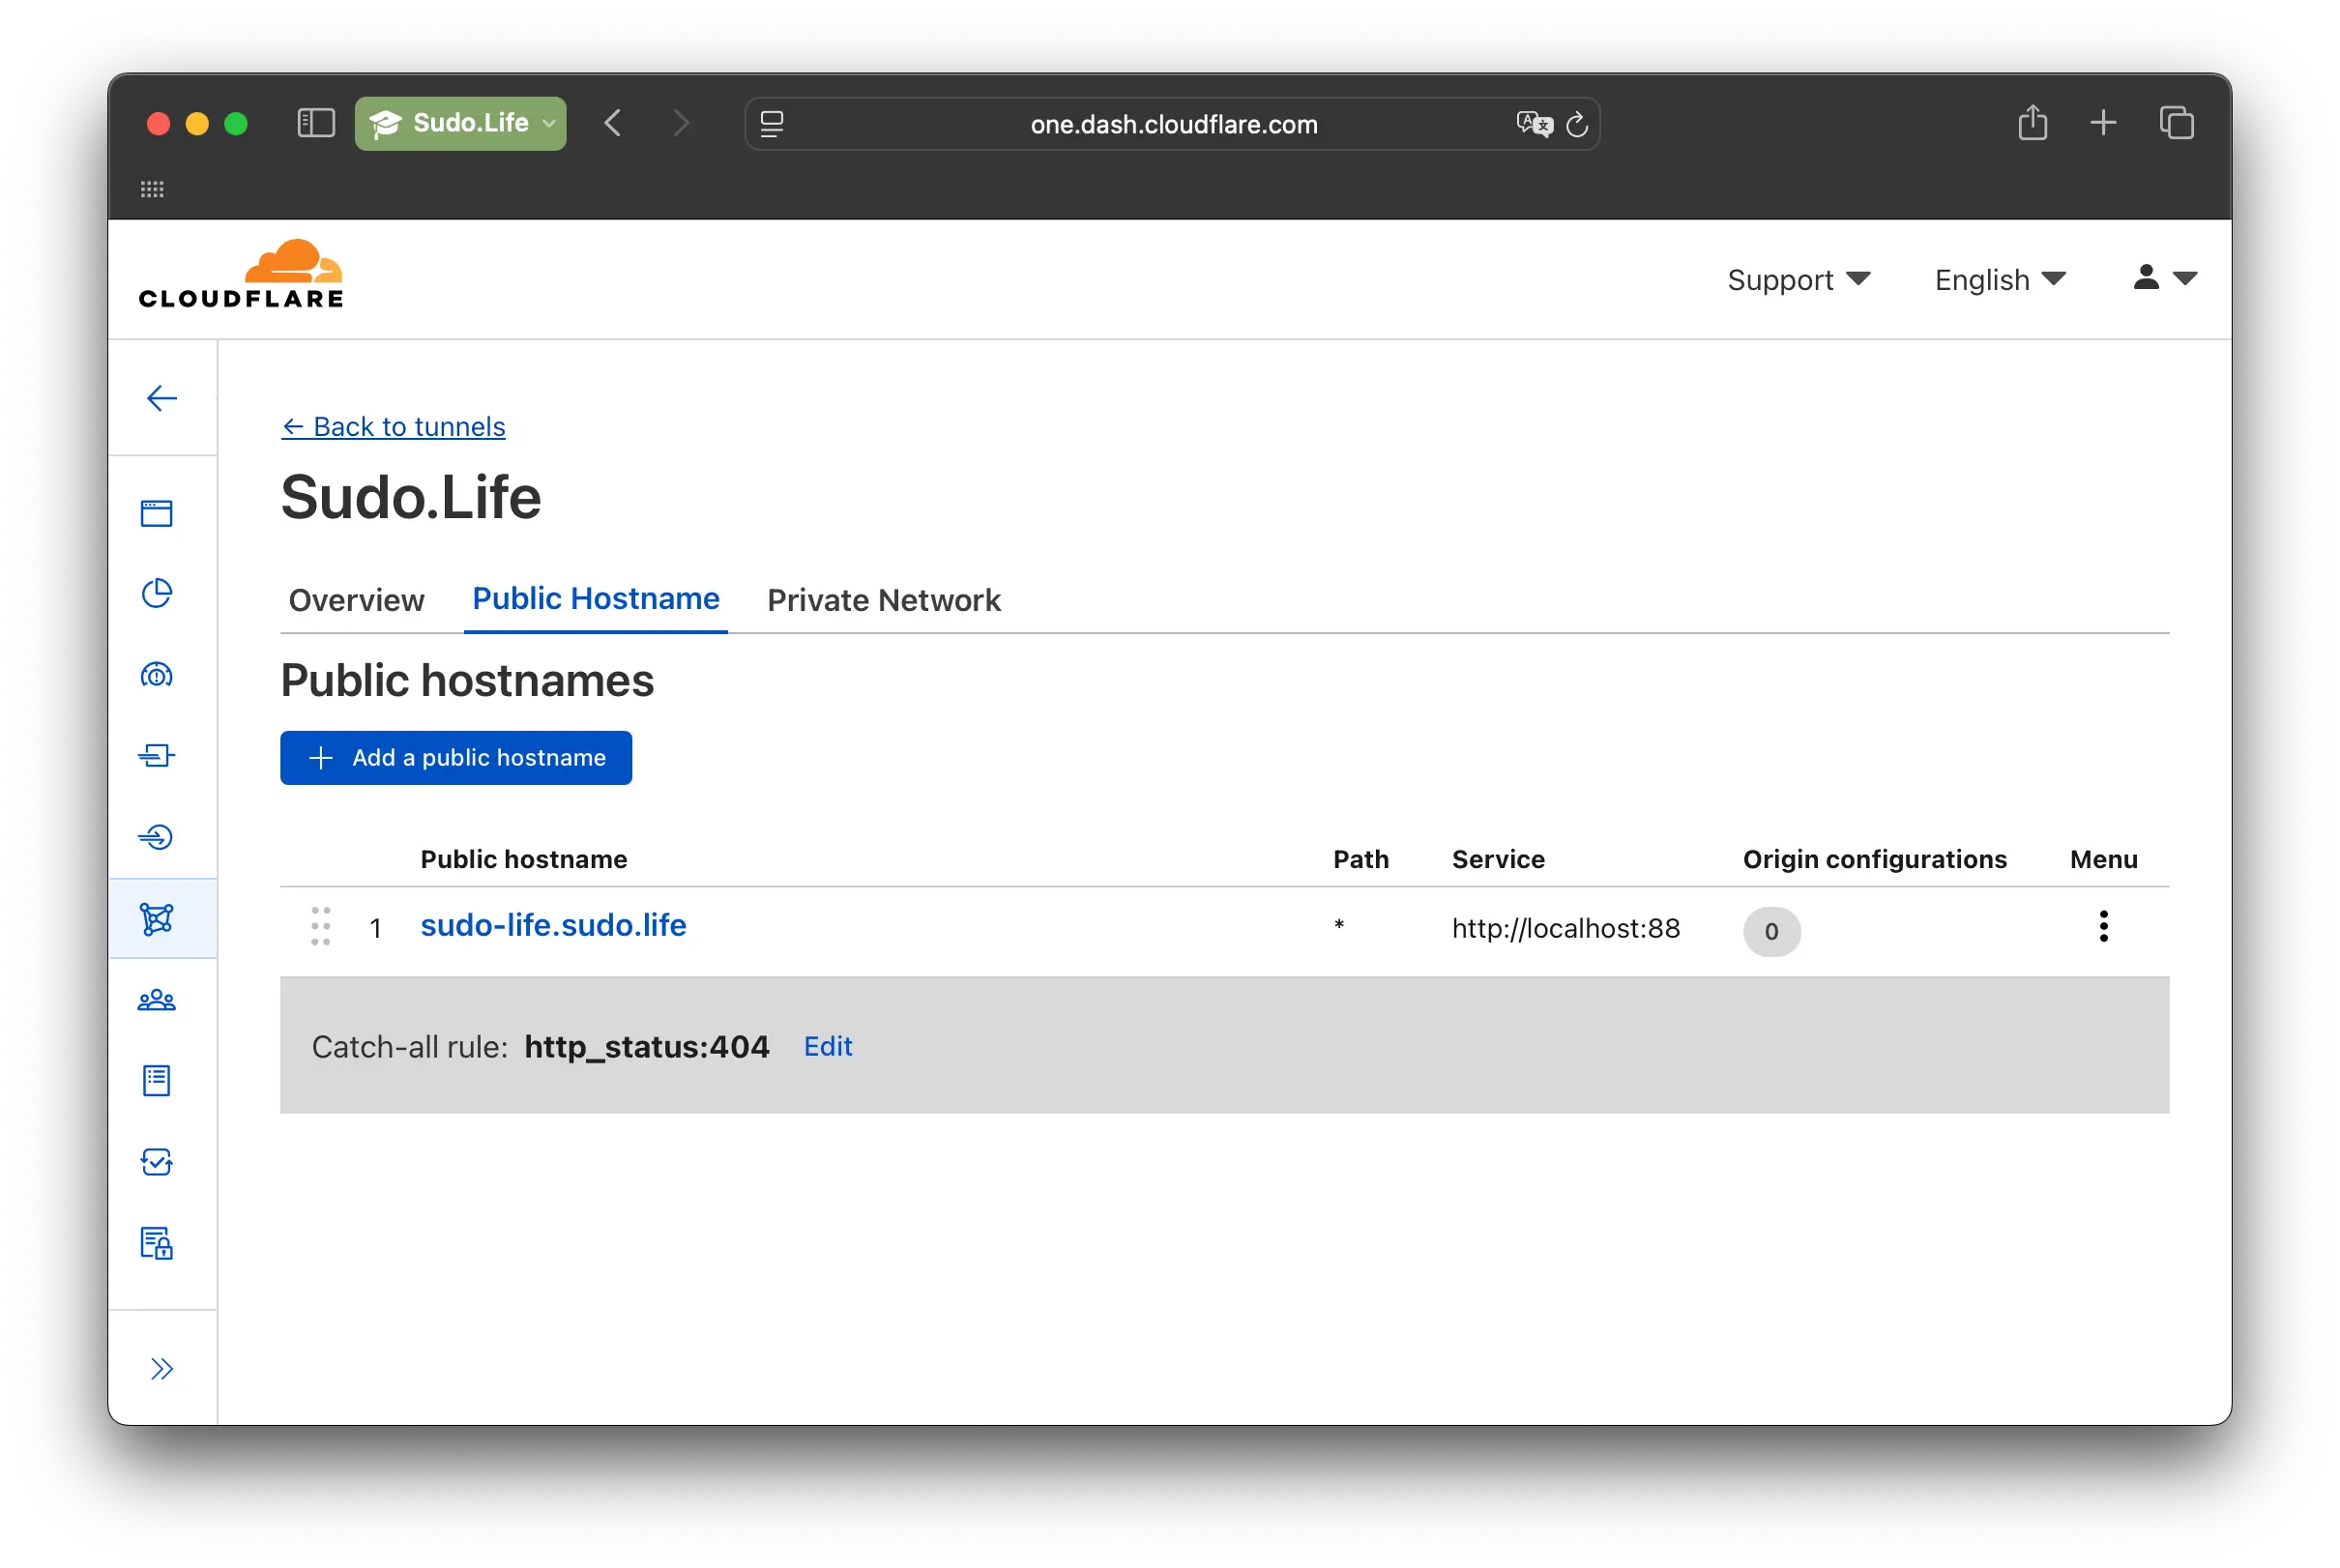
Let’s expose your sudo-life app (http://localhost:88) on the public domain sudo-life.sudo.life
Here’s the high-level flow:
- Set up Cloudflare DNS for your domain.
- Create a tunnel in the dashboard.
- Install
cloudflaredon your server. - Connect the tunnel to a local service.
- Profit (and secure it with Access if you want).
📦 Prereqs
- A domain in Cloudflare (you’ve pointed your nameservers to them)
- A server in your homelab (bare metal, VM, or container — doesn’t matter)
- Something running on HTTP (Upptime Kuma, htttbin, etc.)
- sudo access and basic terminal literacy
🚀 Step-by-Step Guide (Dashboard-Managed Tunnel)
1. Create a tunnel on the Dashboard
Navigate to Network > Tunnel in your Zero Trust Dashboard on Cloudflare. Select Cloudflared. Name your Tunnel, for example ‘I learned this in sudo.life’
2. Install cloudflared on your server
|
|
or
|
|
or
|
|
Find more releases here.
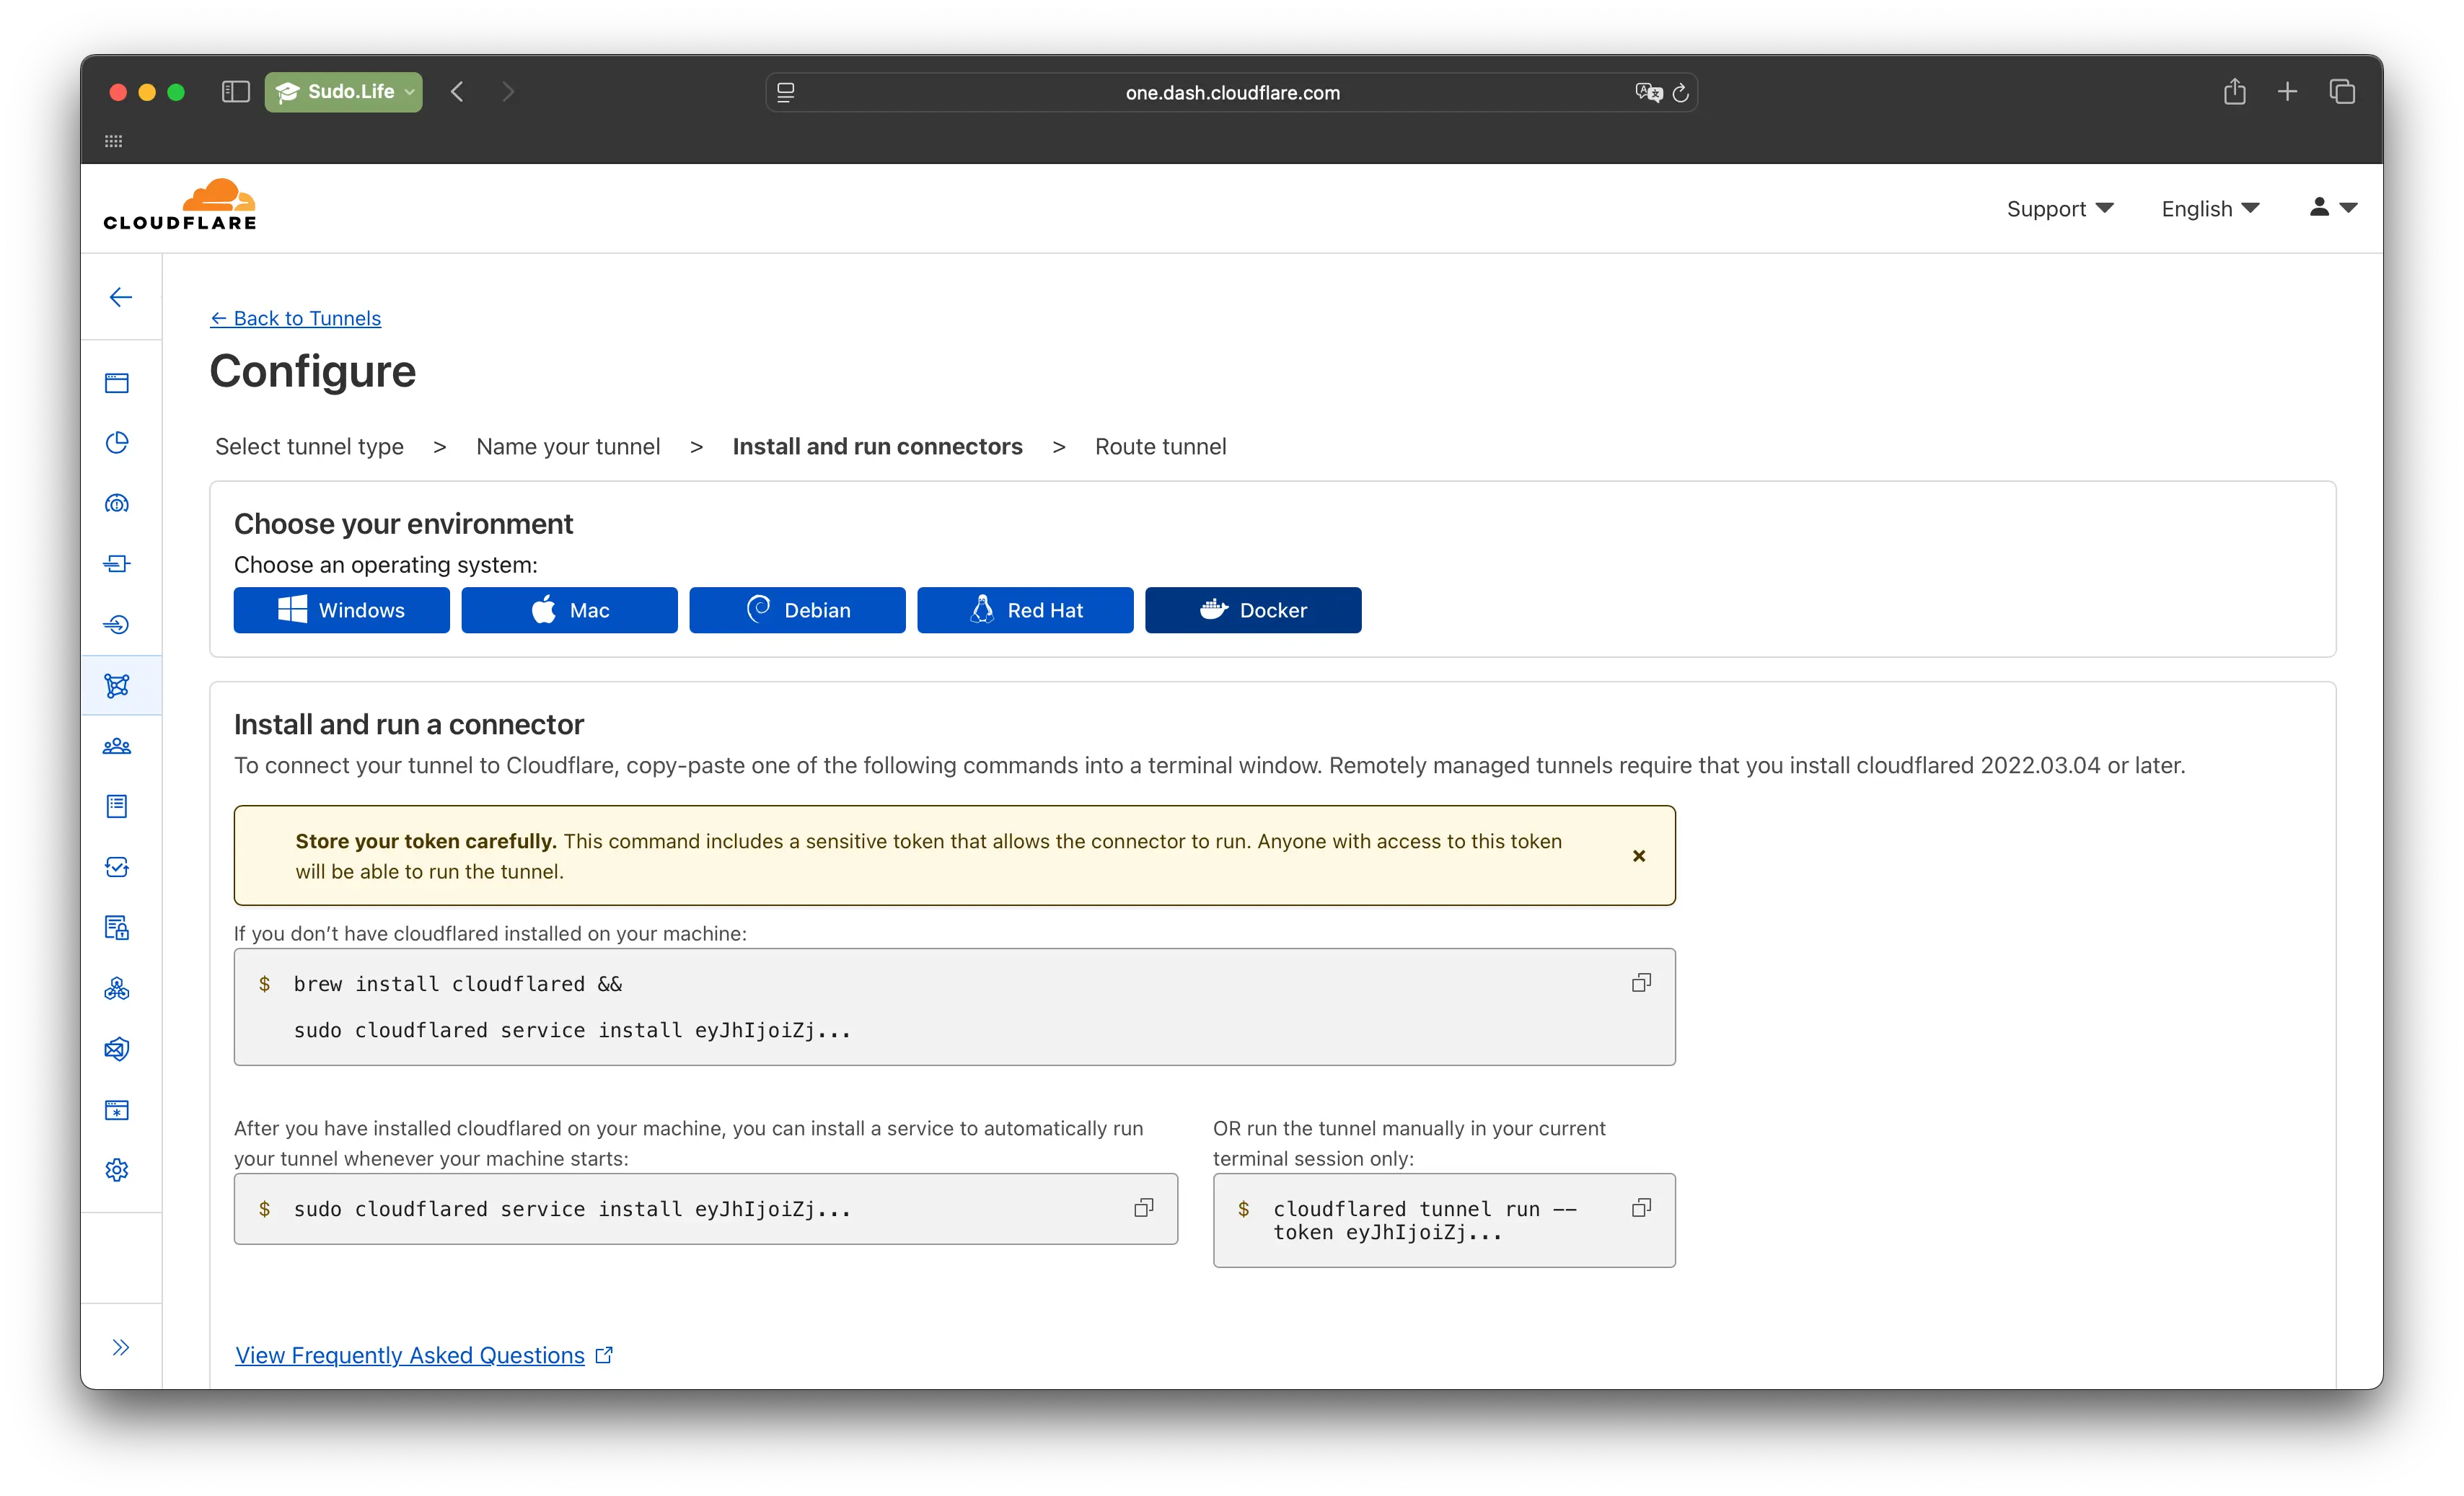
3. Use your token
Use your token to establish the conncetion.
|
|
Configure Tunnel
You should now see Healthy in your account next to the tunnel.

You are ready! Click on the three dots next to the tunnel to configure it.
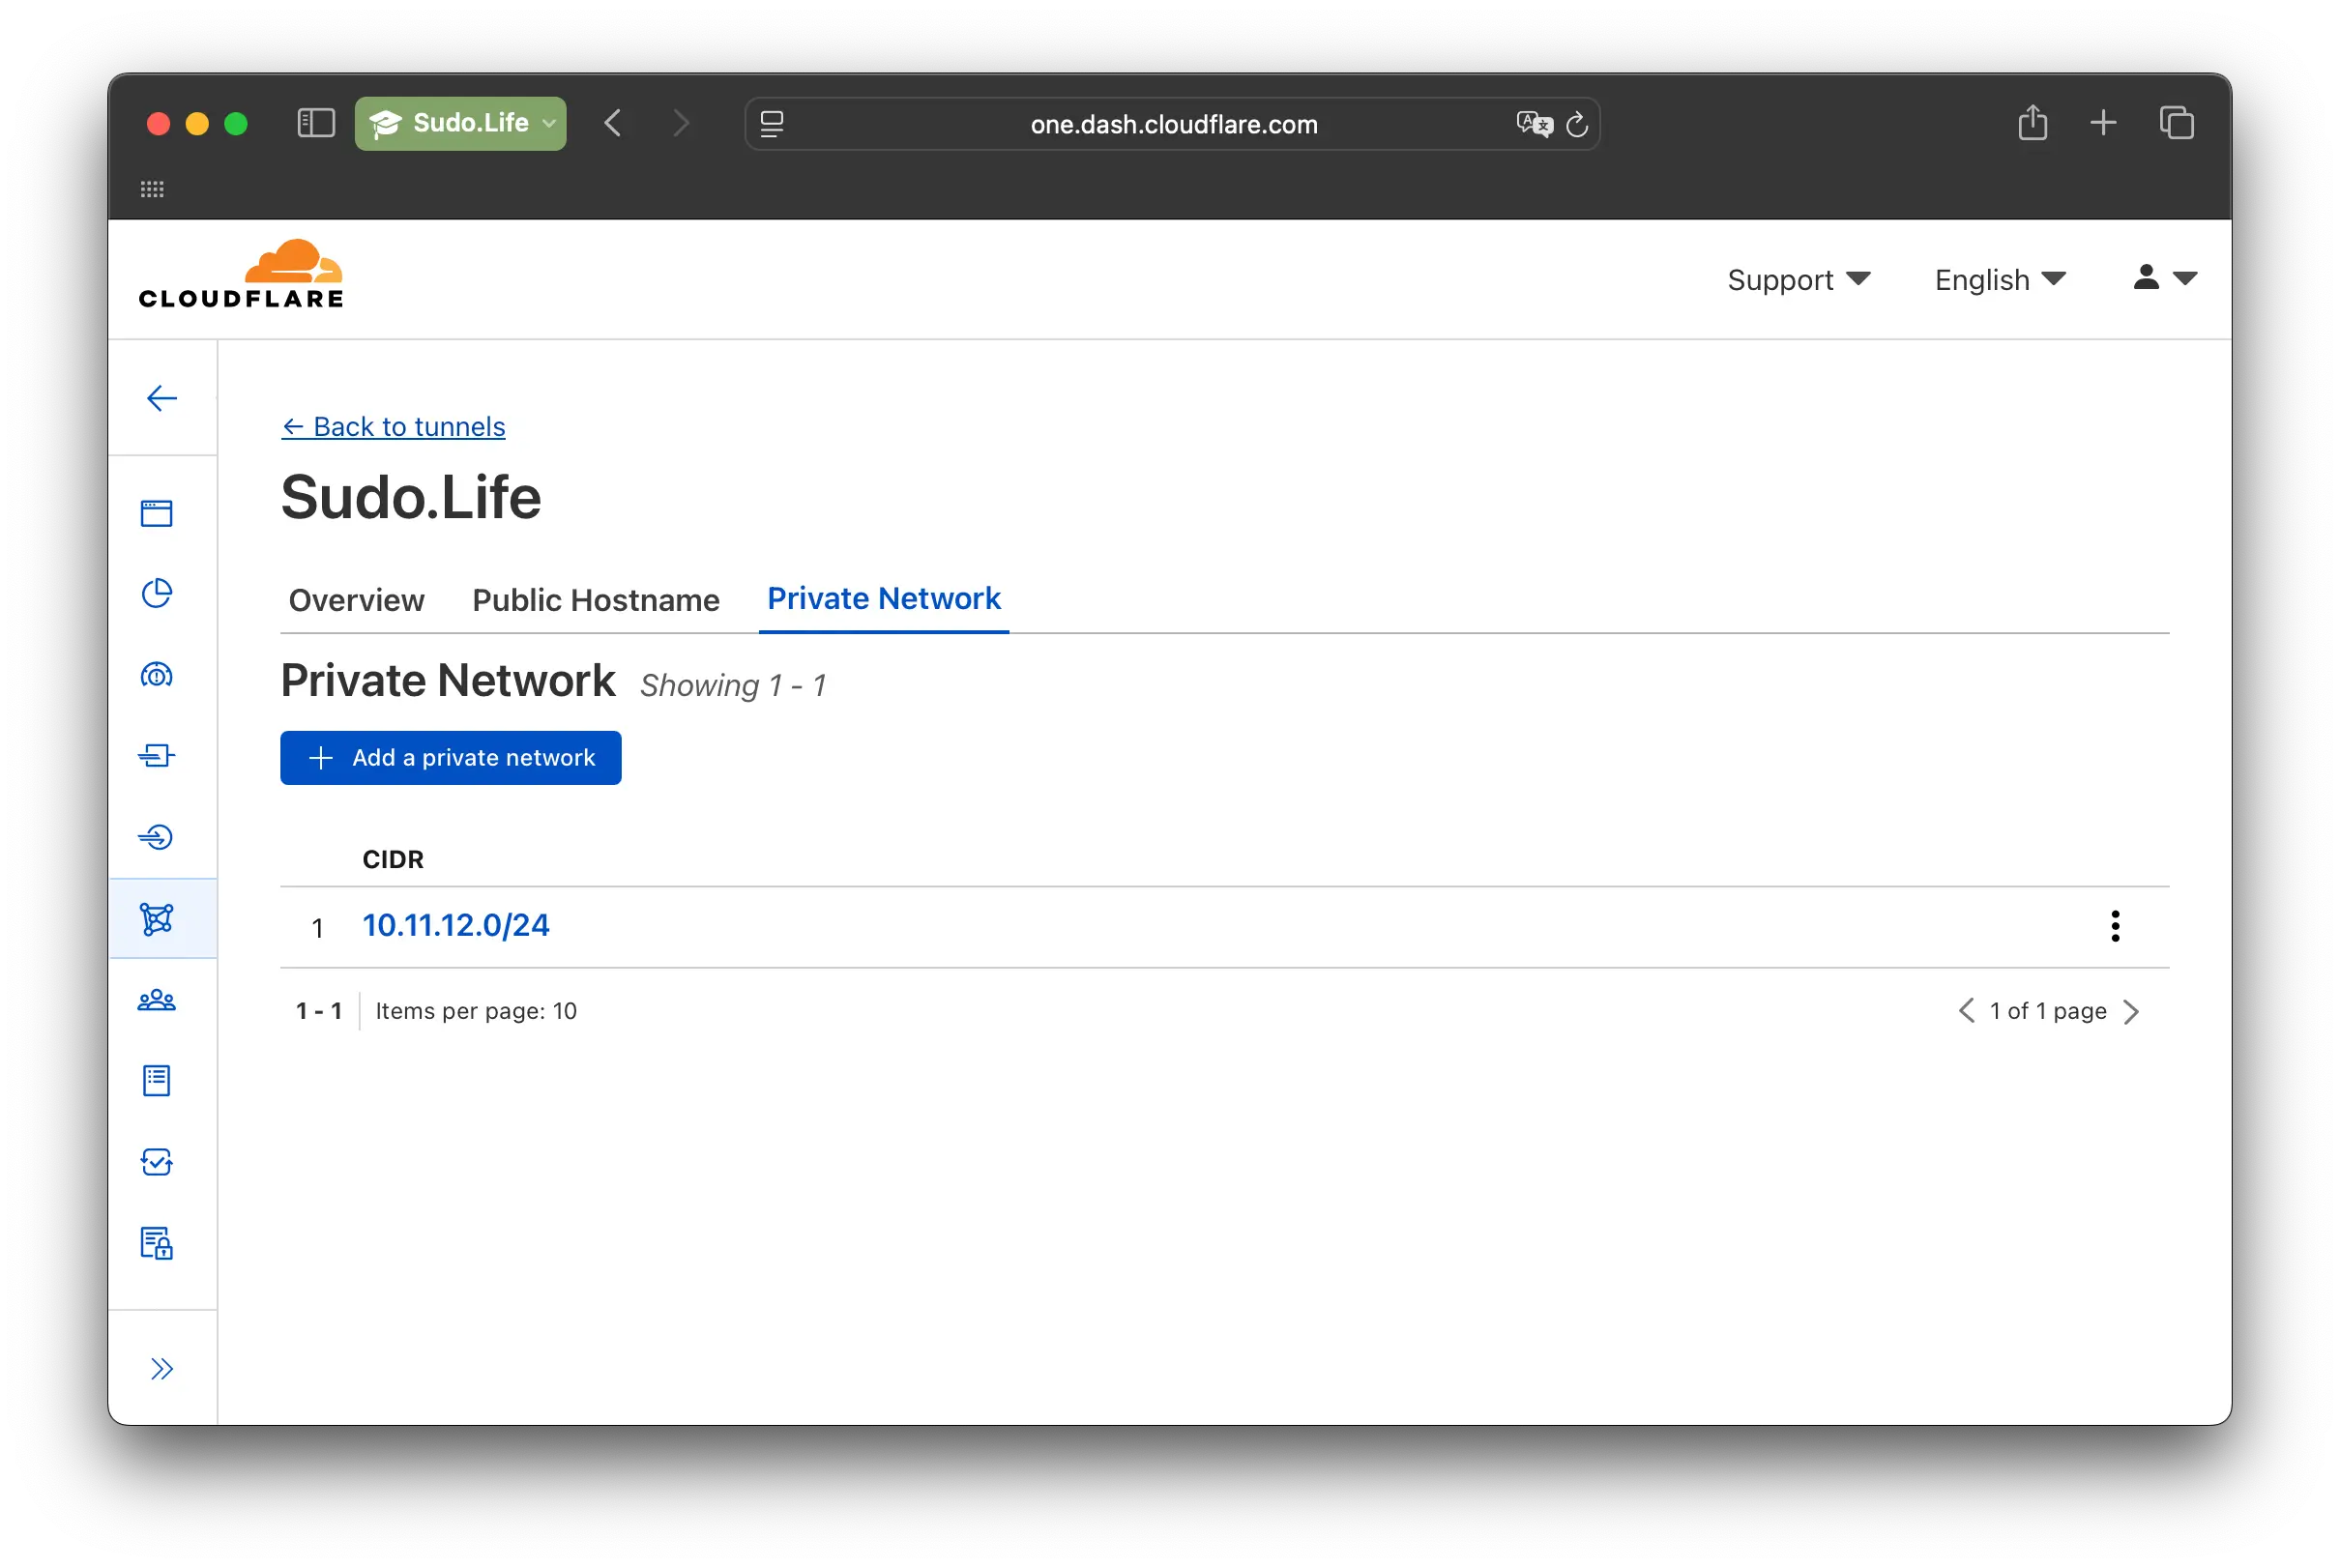
You can now add the local IP Subnet of the host network. Important for some features with Warp etc, but not reqiered for the tunnel to work now.
Really cool is here the hostname. Type the hostname you want, where it is reachable from the device your tunnel is on (localhost or IP) and click on save. And done, you now exposed your service to the Internet.